
Biking Tips for Ride Against Traffick Participants
Please look through this blog post for a brief sharing of my experience, a basic training regimen for riders, and needs and suggestions for our riders…
I joined Ride Against Traffick (www.ratk.org) in 2014 (5 days across Korea) and in 2015 (4 days). I had almost zero biking experience before the first ride. I stopped riding a bike when I was 10 or 11 years old because I didn’t want to wear a helmet. I decided to participate in 2014 because Ride Against Traffick supports Oak Tree Project, which I direct. I had very little confidence in my biking ability but managed to finish the ride okay. I had to walk for some steep mountains during that ride, but was okay otherwise. I discovered a lot of biking is mental. Our body is able to do a lot more than we think. In 2015, despite not being able to train as much in 2014, I performed much better and only had to walk up one mini mountain when my chain came off while changing gears. All of our riders did a fantastic job.
As long as you train, you will find the ride very enjoyable. Korea is beautiful! If you do not train, then you will find the ride pretty miserable. Please train!
Here is a basic training regimen…
For relatively new riders I recommend riding three times a week with at least one day in between each ride.
Aim to average 20km/hr early on. If it’s hard on your body, then average 18 or 16. But within four weeks of training you must be averaging at least 20km/hr. If not, please let the Ride Against Traffick staff know. After 8 weeks you’ll want to be at least at 22km/hr. During the ride we usually have three groups: 20-23km/hr (avg 22), 23-27km/hr, and 28-30km/hr. If you cannot maintain at least 22km/hr during the trip then you likely won’t be able to finish the ride.
Below are some suggested distances to aim for from July to October. If you can’t do a 45km ride by July 30th at a minimum average speed of 20km/hr, then please let the staff know. I suggest doing two shorter rides a week and one long ride a week. I also suggest practicing inclines at least once a week. There is a bridge near 행주대교 called 전호교 that leads to Hyundai Premium Outlets near Ara Lock. Once a week I like to go there and bike up and down the bridge as many times as possible. It’s a short incline (about 500 meters up, 500 meters down) but hard enough that it is like a mini mountain. Incline practice is crucial! It will strengthen your body a lot and also build up your confidence. Don’t be hard on yourself if you find them really hard at first. Learn how to shift down in your gears (lowest gears possible for the steepest inclines) and practice maintaining a constant breathing pattern (don’t let yourself huff and puff sporadically). Riding with experienced riders now and then will help a lot. Also, during the ride we typically bike for an hour and then take a 10-15 minute rest. As you do longer rides make sure to take breaks and make sure to drink a lot of water.
Week of July 2nd… two 20km rides, one 30km ride
Week of July 9th… two 25km rides, one 35km ride (try and increase your speed a little from the previous week)
Week of July 16th… two 25km rides, one 40km ride
Week of July 23rd … two 30km rides, one 45km ride
Week of July 30th… two 30km rides, one 50km ride (be at least averaging 20km/hr in speed by July 30th)
Week of August 6th… two 40km rides, one 60km ride (begin practicing inclines at least once a week, can do 20km with many inclines instead of 40km for one training session)
Week of August 13th… two 40km rides, one 70km ride
Week of August 20th… two 50km rides, one 80km ride
Week of August 27th… two 50km rides, one 90km ride (be at least averaging 22km/hr in speed by August 27th)
Week of September 3rd… two 60km rides, one 100km ride (spend extended time practicing inclines once a week, doing a bridge or small mountain over and over for at least one hour)
Week of September 10th… two 60km rides, one 110km ride
Week of September 17th… two 60km rides, one 110km ride
Week of September 24th… two 60km rides, one 120km ride (we average 150km a day during the 4 days, but if you can do 100km and handle inclines you should be fine)
Week of October 1st… It’s time to ride! Maybe do a short ride over Chooseok and then rest up until the ride begins on the 6th.
It’s okay if you don’t keep exactly to that plan. When I practice inclines I usually don’t do that much distance during the ride. 1 hour of inclines is much harder than 2 hours of biking on a flat surface. Again, make sure you can do at least a 45km ride by the end of July. Make sure to do at least one 100km+ ride by two weeks before the ride. If you do not train sufficiently the Ride Against Traffick staff may not let you participate in the ride.
What you NEED for the ride…
Padded biking shorts… these are crucial! Your rear will hurt so much if you don’t have them. Make sure to get at least one good pair of biking shorts. Don’t buy the super cheap ones, they’ll be very uncomfortable (I learned from experience). Here is a pair that was recommended to me that I have worn comfortably the past two rides: https://www.amazon.com/gp/product/B002KT3XQW/ref=oh_aui_detailpage_o01_s00?ie=UTF8&psc=1. I wear gym shorts over them. I actually purchased two for convenience, but one can suffice.
Front light and tail light for bike… if you don’t have these, we won’t let you ride. You should be able to buy them as a set for relatively cheap. Here is an example: https://www.amazon.com/BV-Bicycle-Headlight-Taillight-Quick-Release/dp/B00A6TBITM/ref=sr_1_4?s=sporting-goods&ie=UTF8&qid=1467386808&sr=1-4&keywords=bike+light.
Water bottle with water bottle holder… if your bike doesn’t have a water bottle holder (https://www.amazon.com/FiveBox-Lightweight-Aluminum-Bicycle-Activities-Black/dp/B014P6HEDA/ref=sr_1_8?s=sporting-goods&ie=UTF8&qid=1467386886&sr=1-8&keywords=bike+water+bottle+holder) then you’ll need to purchase at least one. I recommend having two. Then you’ll also need at least one water bottle for the ride. One bottle will suffice for shorter rides, but if you’re going over 40km you should have two or plan to refill your one bottle. Polar Bottle and Camelbak are both nice. I recommend this one: https://www.amazon.com/Camelbak-Products-Chill-Bottle-25-Ounce/dp/B00EPGMA9E/ref=sr_1_5?s=sporting-goods&ie=UTF8&qid=1467386984&sr=1-5&keywords=bike+water+bottle.
Extra tire tube… you should have one of these on you whenever you bike. They are super cheap and you should be able to get them at any local bike store for 5,000won or less. Here is a picture of one: https://www.amazon.com/Kenda-Bicycle-Presta-Valve-26×1-9-2-125/dp/B001DF39M2/ref=sr_1_5?s=sporting-goods&ie=UTF8&qid=1467387031&sr=1-5&keywords=bike+tube. When you buy it ask the guy to check your tires so you make sure you purchase a tube that will fit your tire.
Helmet… these are lifesavers! You can get these anywhere. I recommend getting one that is relatively aerodynamic (not just a round helmet that skateboarders tend to have).
Multi tool… helpful if you need to work on your bike including adjusting your seat: https://www.amazon.com/Topeak-Mini-Folding-Tool-1-1×0-7-Inch/dp/B0016KY5UE/ref=sr_1_4?s=sporting-goods&ie=UTF8&qid=1467387458&sr=1-4&keywords=bike+mini+tool.
A bike lock… I actually do not bike with one but leave it in a support car or at home for when I’m finished riding. When I stop I always make sure my bike is in eyesight or locked with a friend’s bike. It’s crucial to have a bike lock, though. Bike cable locks are convenient for leaving on the bike when you ride, but they can be cut with heavy duty pliers and stolen (many of my friends here in Korea have had their bikes stolen, some in broad daylight). The U-Locks are stronger and safer (in my opinion). They’re just a pain to have while your riding, which is why I rarely bring my lock with me. Here is an example of a U-lock: https://www.amazon.com/Cocoweb-Security-Attachabe-Carrying-Protection/dp/B00UY34TE6/ref=sr_1_6?ie=UTF8&qid=1467388766&sr=8-6&keywords=bike+lock. If you have to lock your bike up outside unattended then I recommend a U-Lock.
***While all my recommendations were from Amazon, there are plenty of other sites in America and in Korea for biking equipment. www.thisbike.com and www.go-aja.com are two Korean sites and there are plenty of others.
Optional things to get that I recommend…
Bike bag (highly recommended)… this is great for holding your extra tire tube, your phone, a credit card or small cash, and some snacks for the ride. Bike bags come in different sizes for different places on the bike. Here is one similar to what I have: https://www.amazon.com/ArcEnCiel-Bicycle-Cycling-Pannier-Resistant/dp/B00QUY5HAS/ref=sr_1_2?s=sporting-goods&ie=UTF8&qid=1467387325&sr=1-2&keywords=bike+bag. Make sure it will fit your phone in it! Otherwise you might have to purchase a separate holder for your phone.
Speedometer… this helped me a lot during my initial training: https://www.amazon.com/Computer-Fineed-Wireless-Speedometer-Waterproof/dp/B01FUDS4RW/ref=sr_1_1?s=sporting-goods&ie=UTF8&qid=1467387648&sr=1-1-spons&keywords=bike+speedometer&psc=1.
Air pump… helpful if your tires start to lose air. Or you can usually go to a local bike shop and they’ll fill them for you. https://www.amazon.com/Kitbest-Aluminum-Portable-Mountain-Compatible/dp/B011L3LVNY/ref=sr_1_5?s=sporting-goods&ie=UTF8&qid=1467387393&sr=1-5&keywords=bike+air+pump. You can latch that pump on your bike.
Biking gloves… these are somewhat helpful if your hands hurt when you bike. But your hands hurting are likely more due to your need to adjust your seat and for you to relax more when you ride (don’t strain!).
Glasses… these are cheap and great to have to help with the sun and can also help block bugs/wind from your eyes: https://www.amazon.com/MEETLOCKS%C2%AE-Sunglasses-Removeable-CyclingSunglasses-Interchangeable/dp/B0183O3J9S/ref=sr_1_2?s=sporting-goods&ie=UTF8&qid=1467387553&sr=1-2-spons&keywords=bike+sunglasses&psc=1. Any glasses will do though. Like gloves, they’re optional and not required.
A little neosporin, a bandaid, a hydrogel band, and a couple napkins/wet tissues in your bike bag… if your chain comes off while your biking (can happen when you change gears rapidly, especially on a turn), your hands are going to get mad oily. It’s nice to have a napkin or wet nap to wipe with afterward. The bandaid and hydrogel band are helpful for cuts or scrapes that may happen. If you get a bad cut or scrape from a fall apply the neosporin and put the hydrogel band over it. If the cut is really bad, then go to a local hospital. Surprisingly, plastic surgery hospitals (성형외과) are the best for treating bad cuts.
Energy bars or snacks… having a granola bar or some other food for a ride longer than 50km is definitely recommended. Try and eat something small every hour or two of biking. If you’re doing a ride that is more than 5 hours, then have a meal or a good amount of snacks around your halfway mark.
Strava… this is a helpful biking app for measuring your distance and your average speed. You’ll need to have your GPS activated in order to use it and you’ll want to pause it whenever you take breaks. I used it a lot when I first started training.
ADVICE FOR BIKERS
SLOW DOWN when there are pedestrians (especially children) and inexperienced bikers who are slow and wobbly. Ironically the most dangerous part of the trail from Busan to Seoul is the very end: Seoul on a Saturday. When biking through places like Yeoido Park make sure to TAKE IT SLOW! Use your bell on your bike to warn people, but don’t count on them to get out of your way. Wobbly riders are the worst. Don’t let them annoy you; a 10 second delay from slowing down and slowly going by them much better than a bad accident. I’ve seen a number of these accidents during my couple years of training. Please slow down and be safe.
SLOW DOWN when there are a lot of puddles or hazards along the path. If you have to get off the bike path for any reason then be extra careful and please slow down. I had my worst spill because I didn’t slow down enough after having to get off of the bike path for a stretch. It’s okay if you go 15km/hr for a few minutes until you can get back on the trail. If the trail is wet or very dark then bike a little slower than usual. Definitely slow down if you have to bike over gravel and consider getting off and walking your bike. Such spots should be rare along the paths.
BE AWARE of bike police. In Seoul they claim they will give you a ticket if you go over 20km/hr and I have seen them pull people over. I think biking up to 24km/hr is okay, but if you go over 25km/hr then they’ll likely ticket you if they see you. I’ve passed by many of these bike police and they tend to patrol Yeoido Park and other places where there are a lot of pedestrians.
DO NOT take sharp turns at a high speed or change your gears rapidly while turning. I’ve seen people wipe out horribly at sharp turns because of their speed. I’ve also had my chain go off a number of times when I shifted gears rapidly while turning sharply. Adjust your gears before or after the turn. And slow down before the turn, and then accelerate as your turning.
Get your seat checked for the right height for your body. Also make sure your seat is facing forward perfectly and isn’t angled left or right at all. If your knees start to hurt when you’re riding then you likely need to adjust your seat height. Any local bike shop or experienced rider should be able to help you in setting your bike seat height. You can also youtube for directions. We will also check everyone’s seats during the mandatory training session.
Get your chain greased every month or so… I usually go to a local bike shop and ask them to grease my chain and check my gears. I usually give them 10,000won for it. If you have an experienced biking friend they can usually do it for you quickly for free. Definitely get your bike checked at least once before the ride, preferably a couple weeks before the ride. Local bike shops should also give you air for your tires for free. It’s good to check the air pressure of your tires (squeeze with your hand) now and then. If you can squeeze in a bit then go get them pumped up.
Last, drink a lot of water and use sunscreen. If you find yourself thirsty during a long ride then you likely are already becoming dehydrated. While you can survive short rides not drinking, you’ll cramp up and be in a lot of pain if you don’t drink water during a long ride. Drink periodically as you bike. If you aren’t used to biking with one hand then practice that for a bit before trying to grab your water bottle as your biking. Please be safe!
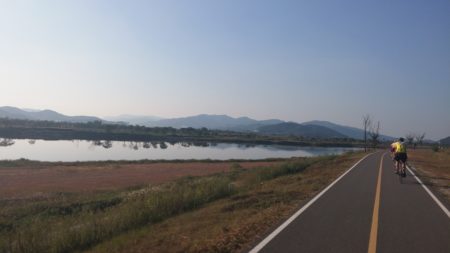
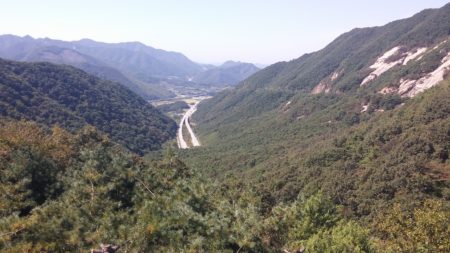
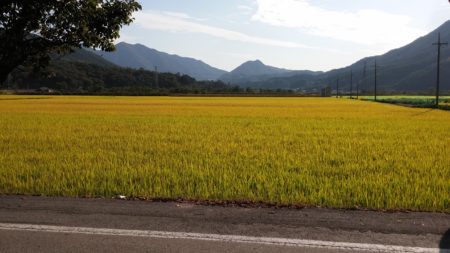
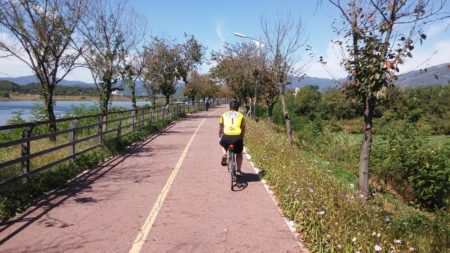
I’ll close with a few pics I took during our ride last year…
Enjoy riding!
